5 Tips for Managing Negative Space in Your Photos
You have probably heard about negative space as a criterion for judging your photos. Or maybe you've heard that you need to pay attention to the negative space in order to build your photos properly.
But perhaps you have difficulty understanding this concept?
In this article, I will explain clearly and simply what is behind the negative space in photography. I will give you some tips on how to use it to create both interesting and impactful photos.
This article will help you understand how to implement a new tool in your photography toolbox. By implementing it, you will make your photos even more interesting and instill in them true meaning.
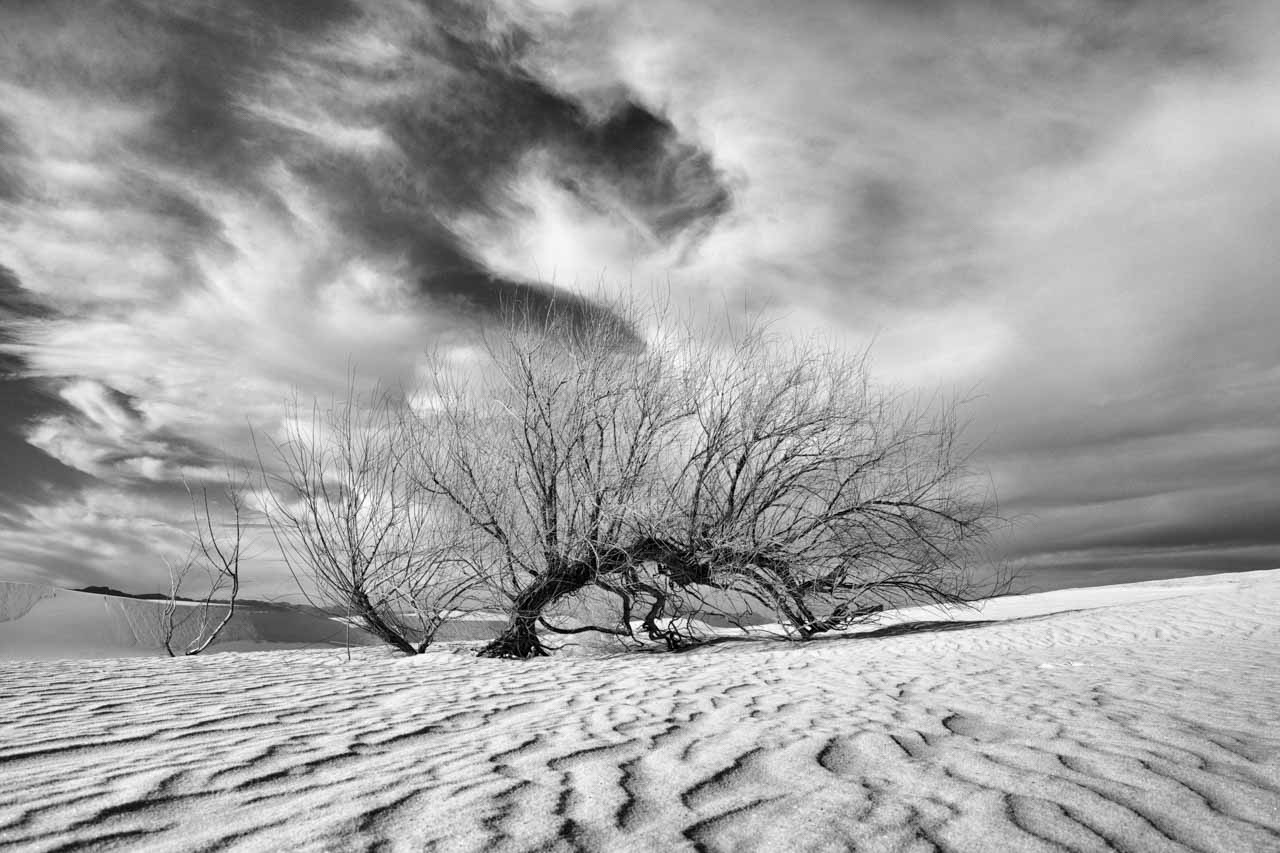
Table of Contents
- The Story Behind This Article
- Definition of Negative Space in Photography
- Why You Need to Pay Attention to the Negative space in Your Photos
- Tip #1 for Managing Negative Space: Pay Attention to Tonality
- Tip #2: Watch Out for Disruptive Elements
- Tip #3: Manage Depth of Field
- Tip #4: Balance Foreground and Background
- Tip: #5: Use Neutral Negative Space
- Finally
The Story Behind This Article
When I started photography, the only rule I incorporated was the rule of thirds. Everyone talked about it. It was the best way to achieve good compositions. Then I would focus on making sharp pictures. For years, those were the only two criteria that were important to me.
When I decided to become a professional photographer, I opted for underwater photography. I decided to take a training course with an American photographer whose book I had read. This photographer's work fascinated me. His name was Jim Church. During the first presentation, he talked to us about negative space. He explained its importance and its interest. He always talked about paying attention to it. I was not familiar with this concept at all. At that time my English was rather academic. I didn't understand everything. I didn't dare ask technical questions.
Thus, I ended the course with an incomplete visual picture of the negative space.
When I got home, I reread my notes to better formalize them. After several readings, I came to understand what negative space was and its value.
During the following years, I mainly practiced underwater photography. I applied this concept assiduously. When I decided to also practice landscape and wildlife photography, I immediately understood that this notion of negative space applied to all photographic domains.
When I started organizing photo workshops in 2007, I realized that few photographers had mastered the concept of negative space. I have always tried to explain it simply because it is essential to build good photos.
Even today, when I talk with other photographers, I realize that the negative space remains nebulous and rather misunderstood. And for this reason, I decided to write and publish this article.
I would like to demystify negative space and give it the importance it deserves.
I hope it will help you to venture even further in your photographic journey.
Definition of Negative Space in Photography
In order to define the negative space of a photo, I propose that you consider a photo as a space composed of two elements:
- Positive space.
- Negative space.
The positive space of a photograph consists of the main subject (the primary photographic element) and the secondary subjects (the secondary photographic elements).
The negative space of a photo consists of the rest of the photo: foreground and background.
By definition the negative space of a photo is everything that is not positive.
Why You Need to Pay Attention to the Negative space in Your Photos
Most beginner photographers are obsessed with managing sharpness, the rule of thirds to compose, framing, etc. In short, they are obsessed with technique.
By evolving photographically, they learn to capture unique moments to create photos that become unique. It is the permanent search for the incredible scene, the sensational. Today, I notice that 90% of photographers are in this state of mind.
Most photographers take pictures that are interesting for a few moments but are quickly forgotten because another photographer has captured yet another unique moment.
The strength of timeless photos is that they hold attention. These are the ones which will mark it because they are well constructed. They are thought in terms of photographic elements and space management.
Negative space is an essential element of a successful photographic construction. But it is not often talked about. Yet most interesting photographs have a negative space that has been carefully planned out.
It is an essential element in photography. It allows to improve the quality of your photos. The negative space of a photo allows you to showcase the main photographic element: the subject.
The negative space is like a jewel case. It serves as an envelope which will guide the glance of the spectator.
The function of negative space is to highlight the subject of a photo.
The negative space allows you to approach the creation of a photo from a new angle. Indeed, you can consider that a photo is composed of distinct parts:
- Frame. It imposes the physical limits of your photo. These are the edges.
- Positive space. It is composed of the main (primary) or secondary photographic elements (like subject and the secondary subjects).
- Negative space. It is composed of the background and the foreground. It determines the atmosphere of your photo. It is the case that will carry the subject.
You may not be used to looking at a photo in this way. But it is very practical and easy to use.
By paying attention to the negative space, you will make pictures that have more impact and will hold the attention of the viewers.
It may seem strange to you because you think that a photo is primarily a subject. But always think of the case that contains a jewel. It is the case that will make the success of the whole. It will give a good first impression. This is the same principle for the negative space.
Tip #1 for Managing Negative Space: Pay Attention to Tonality
I must remind you that the tonality concerns the whole photo. The tonality can be clear or can be forced. It is the general rendering of the brightness of a photo.
Tones are about the elements in your photo. You can have light tones, dark tones and medium tones.
Tones are very precise. For example, you can say that your main photographic element (the subject) has light and/or dark tones. If your subject is predominantly light, your negative space should be predominantly dark.
If your subject has a majority of dark tones, your negative space should have a majority of light tones.
You will probably wonder where the average tones are. That's a good question. If you remember the principle of art called gradation, your midtones are going to be used to graduate from light to dark or from dark to light.
Tip #2: Watch Out for Disruptive Elements
In a photo, the disruptive elements are those that do not contribute to the reading and understanding of the image.
They do not help the reader to decipher the meaning of a photo.
When you compose and when you frame, you absolutely must exclude them.
Why? Because they are likely to attract attention and distract.
In addition, disturbing elements can cause mass imbalances in your photos.
It may be a dead tree trunk. It may be a stone or rock in the corner of a photo.
Identifying a disturbing element in a photo is pretty easy. You look at all the elements you have chosen to place in your scene. You study the relationships between the elements. If you see an element that is not related to others, it is disrupting or unbalancing the whole. It is a disruptive element.
To remove it, recompose or crop. If you can't do it in the field, you can always do it when developing, but I still recommend that you take great care when shooting.
Tip #3: Manage Depth of Field
When you take a photo, you have the choice to either put forward a main element called a subject, or to show a mood, or to create an abstract photo. It all depends on your goal and what you want to show, translate, transmit.
But in all three cases, you need to manage the depth of field well so as not to leave the negative space to chance in order for your photos to have impact and be interesting.
If you want to emphasize a main element, the bokeh technique of blurring the background is appropriate. It allows you not to draw the eye on a part which is not essential.
The foreground can also be blurred. It is not always possible to do this when shooting. Developing allows you to blur any part of a photo.
If you want to create a mood photo, it means that you want to take the viewer into another universe, or another world. In general, these photos have a large depth of field. The negative space must be as clear as possible because all the elements of the photo are interesting.
In the case of an abstract photo, there is no negative space. Consequently, there is no positive space.
Tip #4: Balance Foreground and Background
In an interesting photo, all the elements must bring something to the viewer. The void must have a meaning. In this case, said frame is well filled. If the negative space in your photo is composed of the foreground and background, remember to balance them well.
Remember that the foreground should welcome the viewer, to step into your photo. Do not make it too wide. The tone should be rather clear so as not to block the eye. The foreground is an invitation to enter a photo.
The function of the background is to highlight the subject (the main element). It must create the contrast of light and color. It can occupy the entire frame, unlike the foreground.
To create a negative space that strengthens your photo by carrying the subject, you must balance the foreground and background.
This balance is based on the tones, the color, the masses, and the sharpness. The balance must be harmonious and respect the things listed above.

Tip: #5: Use Neutral Negative Space
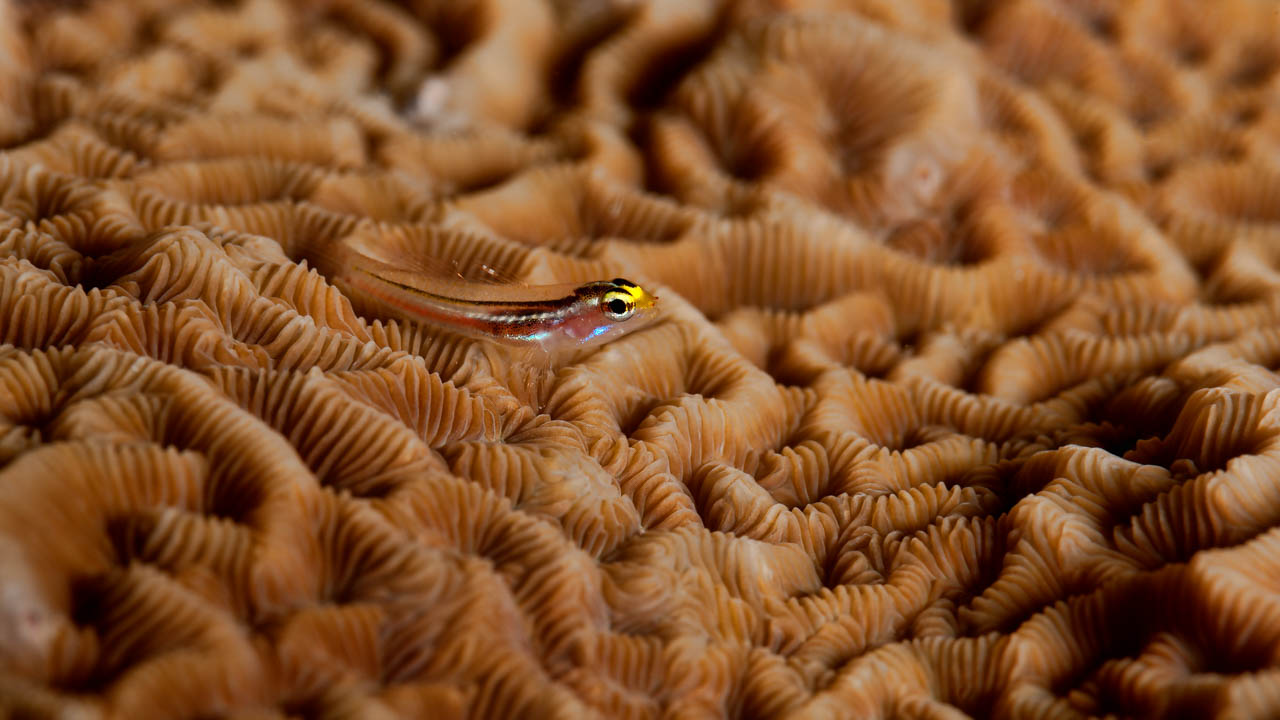
The negative space in a photo is intended to highlight the main element, in other words, the subject. It should not be the essential element. It serves as a support. That is why I advise you to choose neutral negative space.
I'm talking about tones, masses, and details. If, for example, you are photographing an animal with great sharpness and a lot of details, your negative space must be blurred, light. It should not attract the eye.
The negative space must not provoke an engagement or a discussion, because otherwise it becomes the interest. It must be interesting but only complementary to the subject.

Finally
You now know that the negative space of your photos is an essential part. You must manage it well because it is the one that carries the subject or the main element.
It allows you to judge certain photos. It allows you to create harmonious compositions.
Keep in mind that you must manage the tones and the disturbing elements. It is not him who is the subject of your photo.
Be humble, patient, constant, persevering, and persistent because the road to excellence is long.
")
")
Add comment